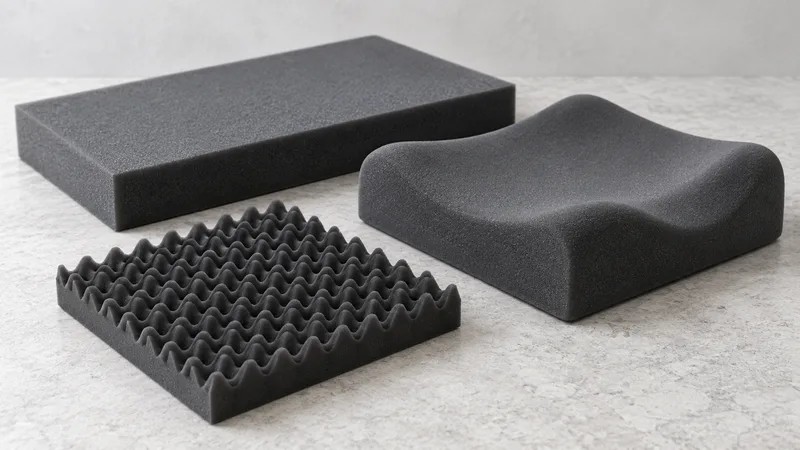
Compare forms through the seat geometry
PU Foam Cushion shapes and molded options are routes to discuss around a seating assembly. A flat pad, a shaped cushion and a molded concept can share a material family while carrying different geometry information. The client knowledge base describes density and ILD selection and formed cushions as planning directions; actual manufacturing scope remains [需确认].
A flat pad is useful when the immediate question concerns a simple sitting surface, thickness or base clearance. It can make an early comparison easier to define, but its lack of contour must remain visible in the record. A later front-edge transition or underside pocket represents a geometry change, not merely a new name for the same pad.
A shaped cushion expresses local transitions. Show the central section, side regions, front edge and base-facing surface. Indicate whether a curve is critical to contact, clearance or appearance. A top-view outline cannot define how those regions meet a cover or sit against a contoured seat pan.
- Keep the seat, cover and base revisions identified.
- Record the proposed material and unresolved evidence separately.
- Assign an owner to the observation or specification question.
A molded route can be discussed when the form and proposed processing make it relevant. Ask which geometry, material record and tooling assumptions are included in that proposal. Do not assume that molding automatically provides inserts, skins, controlled density zones or an in-house process.
Use the PU Foam Cushions product hub to send the drawing and reference seat. If the form question is still part of a broader material decision, the seating selection guide helps establish the assembly context first.
Control local sections and underside features
Begin the drawing with a clear seat datum and orientation. Show the outline and add sections through the sitting area, front edge, lateral transition and any underside feature. Mark the base reference that each feature must meet. This prevents a converter from guessing which surface defines the cushion height.
Pockets, recesses and passages should be shown with their purpose. A clearance feature may protect a mechanism or make room for an attachment, while a shallow cosmetic depression may have a different priority. Name the adjacent component and identify which dimensions must be confirmed before a route is recommended.
Keep thin local sections visible. An overall thickness can look sufficient while an underside recess leaves less material above hardware. The project owner should decide whether that section is acceptable under the intended seat configuration. The knowledge base does not supply a universal minimum feature thickness or a load limit.
Specify edge transitions with enough information for sample review. A radius, taper or contour may affect cover placement and visual alignment. Request the achievable geometry and tolerance for the proposed route rather than borrowing a value from another foam family or from an unrelated sample.
Add a reference to any counterpart cushion or handed version. A mirrored outline may still have different underside features or attachment locations. A controlled drawing should make those differences visible to assembly and quality reviewers before the sample is packed, covered or installed.
| Decision field | Project input | Review purpose |
|---|---|---|
| Flat pad | Planar section or early thickness trial | Record differences from the final contour |
| Shaped cushion | Local contour and base features | Provide sections, datums and cover references |
| Molded concept | Defined form and process proposal | Confirm tooling, finishing and capability |
| Covered assembly | Cushion plus cover and frame | Inspect before covering and after installation |
Review the cover as a counterpart component
Cover fit is part of cushion form development. Identify the material construction, seams, attachment locations and whether a backing or additional layer is included. Share the intended fitting sequence. A cover assembled from one direction can interact with a contour differently from a cover closed around an already installed cushion.
Check what the cover conceals. Some edges and identification marks disappear after fitting, so inspect them beforehand or provide another traceable reference. If a contour is critical to the seat position, decide how its location will be assessed in the covered assembly without cutting the sample apart.
Observe seams at transitions and front edges. A wrinkle, offset seam or tight region can identify a mismatch among the cover pattern, cushion shape and installation technique. Do not automatically attribute the issue to the foam grade. Record the configuration so the responsible team can revise the correct component.
If bonding, lamination or inserts are proposed, list them separately. Confirm the interface, process scope and evaluation requirement. The knowledge base does not establish universal adhesive compatibility or an approved insert range. A shaped foam photograph cannot fill those gaps.
Retain the cover revision with each sample. A new fabric construction, seam or attachment tension may require a fit review even when the foam drawing is unchanged. Keeping the counterpart history prevents an approved cushion form from becoming an unexplained reference for a different covered seat.
Separate tooling choices from material approval
A molded concept combines a geometry proposal with a process discussion. Request tooling inputs, ownership, revision handling and the features being formed. Ask which preparation, trimming or finishing steps are included. These questions are needed before a sample route can be compared fairly with another shape-conversion proposal.
Density and ILD must still be identified for the proposed material. The planning record contains 25–70 kg/m³ and 25% ILD 100–350 N/314cm² as [需确认]. A three-dimensional form does not turn those provisional ranges into validated grade choices, and the forming route does not establish a comfort outcome.
The density and ILD guide keeps method, indentation percentage, force, area and specimen conditions together. Use those fields when comparing form samples so that a new contour is not mistaken for a material-only change.
When evaluating terminology, refer to ASTM International and the ISO standards catalogue with the project team. Public method references cannot establish a supplier tolerance, validate molding capability or certify the completed seating system.
Commercial questions belong beside the process proposal. State expected volume, revision timing and packing needs, then request confirmation of the proposed supply conditions. Do not infer minimum order, lead time, free tooling or production capacity from a general statement that formed cushions are available for discussion.
Inspect the form before and after seat assembly
Prepare an inspection sheet around the geometry priorities. Check datums, outline, local sections, pockets and orientation before fitting the cover. Record which features were directly measured and which were reviewed against the seat base. A clear method allows another reviewer to understand what the sample established.
Assemble the intended cover and install the cushion using the planned sequence. Observe attachment access, edge alignment, movement and any interference with mechanisms. If installation requires a change of sequence, record it as part of the proposed construction rather than treating it as an incidental workshop adjustment.
Evaluate the covered seat in the intended positions with the project owner. Separate comments on appearance and seated response from dimensional approval. A shaped sample can help the team discuss support zones, but it does not prove ergonomic benefit, fatigue life or safety compliance.
Record deviations and proposed revisions by component. A contour change, a cover change and a material change should each have a controlled identity. If several change together, call the next sample a construction review and retain the old configuration for comparison.
Use the office, auto and equipment seating brief to hand off the accepted form. Include drawing, cover and base revisions, material questions, tooling scope and inspection owners. This gives procurement an understandable request without implying unverified capabilities or performance.
Plan revision access before committing to a form
A form proposal should explain how the project will handle the next revision. Identify features that are likely to change after the covered sample is reviewed, such as the front edge, underside recess or seam transition. Ask the process owner how those changes would be represented in the drawing and sample route. Do not promise effortless tooling changes or unconfirmed costs.
Agree which geometry is fixed for the next sample and which remains exploratory. An early form may answer cover fit while leaving a support contour open. Mark that approval scope explicitly so another department does not order the exploratory version as a released cushion. A sample photograph should carry its revision identity when it is used for coordination.
Check identification and handling at the workstation. A curved cushion may be difficult to orient before covering, and two similar versions may be confused once wrapped. Ask assembly to review the proposed orientation method and packing separation. These practical questions belong to the form decision because a correctly shaped part can still be installed in the wrong direction.
If a feature cannot be inspected after covering, define its pre-cover check and record retention. That plan protects a critical underside clearance or local section when the seat is later assembled. Keep the inspection requirement tied to the drawing rather than relying on an operator to remember which sample was approved.
- Confirm drawing and counterpart identities.
- Review the proposed cushion in its intended assembly.
- Record observations, open questions and approval scope.
- Recheck affected conditions when a component or grade changes.