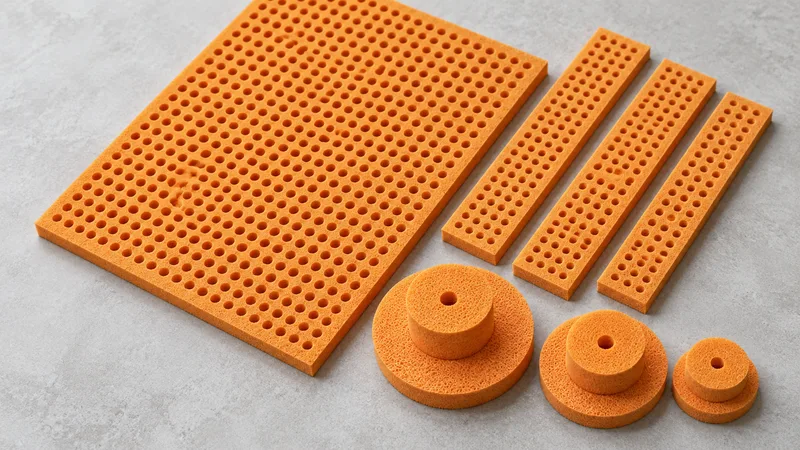
A natural rubber foam sheet, strip or custom pad is a delivery route for a reviewed geometry. It is not automatically a stocked product, a fixed tolerance or an adhesive-backed component. The planning record describes NR Foam for pads, bumpers and grips, with conversion capability still to confirm. This guide helps a buyer prepare the format conversation without creating unverified SKU claims.
Begin at the Natural Rubber Foam hub with the mating parts, the contact area and the intended installation. State whether the first goal is a prototype, a repeatable production outline or a material comparison. The same drawing can lead to different routes depending on operator access, corner treatment and how the part is inspected.
Match the format to the geometry
Flat stock is often the clearest starting point when the part is a rectangle, simple ring or spacer. It lets the team discuss thickness, contact and clearance before committing to a complex cut profile. Ask which nominal dimensions are available for the proposed grade and whether the edge will be supplied as cut, slit or otherwise converted. Keep all capability answers [需确认].
Strips make a linear route visible. A strip can run along a straight interface or follow a perimeter with defined corners and joins. The drawing should show width, thickness, length, start and end points and the direction in which the operator places it. A strip may reduce the number of pieces, but it can add a join or alignment step that must be sampled.
Custom pads are useful when the outline carries information that a rectangular blank cannot. Holes, shoulders, radii, notches and local reliefs can be controlled on a revisioned drawing. The outline still needs a datum scheme, critical dimensions and an inspection plan. A photograph or filename is not a substitute for those controls.
| Format route | Useful starting point | Inputs to confirm |
|---|---|---|
| Sheet | Flat pads, spacers and prototype outlines | Stock dimensions, thickness, edge and cut method |
| Strip | Straight runs or repeatable perimeters | Width, length, ends, corners, joins and orientation |
| Custom pad | Holes, steps, radii or controlled outline | Drawing revision, datums, critical tolerances and inspection |
| Multi-piece set | Different zones or staged installation | Part marks, sequence, interfaces between pieces |
| Backing option | Positioning or handling support | Adhesive, liner, lamination and surface compatibility |
- Start with flat stock when contact and clearance are still being learned.
- Use a strip concept when the joint follows a repeatable line or perimeter.
- Use a custom outline when holes, steps, corners or orientation drive the fit.
- Use a multi-piece set only when each piece and its assembly order can be identified.
These routes are not guaranteed availability statements. The customer record does not confirm thickness, width, die cutting, CNC cutting, backing, lamination or production tolerances for NR Foam. Ask for the proposed route against a controlled drawing, then let the sample show whether the option is practical.
Make the drawing reviewable
Give every format a controlled identity. Include a part number, revision, material family, proposed thickness and a reference edge. Mark dimensions that govern contact separately from information dimensions. If the part will be flipped or installed in one direction, show a small orientation arrow and a clear top surface.
Show the mating hardware around the foam. A pad outline without its housing, handle, cover or clamp does not reveal available clearance. Add a section at a straight run and another at a corner. If a fastener passes through a hole, show its head and the keep-out zone that protects the installation.
Join and corner choices deserve their own note. A butt join may be easy to inspect but needs a controlled location. An overlap can change local section. A separate corner piece can help conversion while adding a part mark and a second installation action. Keep the choice visible until an assembled sample confirms it.
| Drawing item | What to show | Review question |
|---|---|---|
| Reference and revision | Datums, part number and controlled revision | Are all quoted parts based on the same outline? |
| Contact edge | The edge that must touch or clear the mating part | Which dimension controls the interface? |
| Corner and join | Radius, butt, overlap or separate corner | How will the operator install and inspect it? |
| Section | Thickness, steps and local reliefs | Where could a fold or interference occur? |
| Identification | Orientation, labels and packing note | How are pieces kept in order at assembly? |
For standards vocabulary, consult the ASTM International standards catalogue and the ISO standards catalogue. Use the applicable method chosen by the project team. These public references do not validate a supplier conversion process or establish the tolerance of a Natural Rubber Foam part.
- Assign datums, revision, orientation and a part identification method.
- Mark contact edges, reliefs, holes, steps, radii and keep-outs.
- Show straight and corner sections with the mating components.
- List the dimensions that require direct measurement during inspection.
Keep backing and joining as separate decisions
Backing is an installation aid, not a consequence of the word “custom.” If the project needs adhesive, liner or lamination, show which surface receives it and how the operator removes the liner. Name the receiving surface and the time between placement and closure. Compatibility, aging and peel performance remain project questions until evidence is available.
Joining is another separate decision. A perimeter strip may need a butt, overlap or a separate corner. A grip pad may need a seam that stays outside the hand contact area. A bumper may need a split to pass over a core. Describe the intended route and inspect it in the assembled position instead of assuming that a cutting outline solves the joint.
Packaging and identification can be part of the format brief. Multi-piece sets need labels, orientation and a packing sequence so that the correct pad reaches the correct station. Expected volume and timing can be listed as project inputs. Do not invent MOQ, lead time, stock or capacity statements.
- Record backing, liner and lamination as independent scope fields.
- Show join location and corner treatment on the controlled revision.
- Specify orientation, part marks and packing order for sets.
- Mark process-dependent tolerances and capability as [需确认].
For the selection sequence behind these format choices, use the NR Foam elastic cushioning guide. It keeps the contact surface, load direction and deflection space attached to the route decision.
Compare a sample, not only a profile
Prepare a sample with the real mating parts or a controlled fixture. Label the drawing revision, proposed format, thickness question and orientation. Install the piece with the tools and sequence expected in production. Record whether the sheet, strip or pad stays in position and whether corners, holes and joins remain accessible.
Inspect the interfaces that a flat bench hides. Check the first and last strip points, each corner, every hole and each transition from a thick to a thin section. Look for lifting, folding, edge damage, interference and operator difficulty. These observations tell the team whether a format is workable without claiming a universal durability or performance result.
When the geometry changes, repeat the review. A two-millimeter shift at a hole, a different corner radius or a new backing layer can change the installation route. Keep the old record and identify the new sample. “Same material” does not mean “same construction.”
Also review how the part is handled between conversion and installation. A thin sheet may need a carrier or a packing orientation to prevent a corner from folding before it reaches the workstation. A long strip may need a mark at the start point so that the operator does not reverse the route. These are practical questions for the sample and packing brief, not assumptions about a standard product.
If a project moves from a prototype rectangle to a shaped pad, keep the original flat-stock observations as context. Record which edge, hole or radius was added and whether the operator route changed. This makes the comparison useful to engineering and purchasing and prevents a new outline from being described as an unchanged part.
- Confirm part identity, drawing revision and the proposed format.
- Install the sample in the planned orientation and sequence.
- Inspect contact, edges, corners, joins, holes and clearance.
- Record deviations, open capability questions and the approval owner.
- Repeat when section, backing, outline or mating hardware changes.
The NR Foam density and hardness guide can support the material record, but density and Shore C are not a substitute for a format sample. Keep the method, specimen and thickness beside any value used in a comparison.
Release a format route with open questions visible
A release record should explain why a sheet, strip, custom pad or set matches the reviewed interface. Attach the outline, section, backing decision, installation sequence and inspection checklist. Mark any unconfirmed conversion capability, tolerance, adhesive compatibility or environmental result [需确认].
Natural Rubber Foam is described for industrial, sports-equipment and footwear directions in the knowledge base. That scope does not prove a named customer project or a safety result. Keep the application boundary with the drawing and approval owner so that a format recommendation is not mistaken for a performance claim.
Use the grip and bumper project brief when the part carries a human contact surface or an equipment stop. It provides a place to record installation, interface and acceptance questions. For a separate material comparison, start a new brief rather than copying an old tolerance.
The best format choice is traceable: it shows the geometry, the assembly route and the evidence still needed. A natural rubber foam sheet, strip or custom pad then becomes a reviewed construction instead of a vague catalogue label. Keep the route flexible until the drawing and sample prove that it fits the project.
Finally, make the handoff readable to the next person. Attach the latest drawing, sample photographs when permitted, inspection notes and the list of open capability questions. A clear handoff lets the supplier respond to the intended construction and gives the customer a precise place to confirm thickness, cutting, backing or tolerance details.