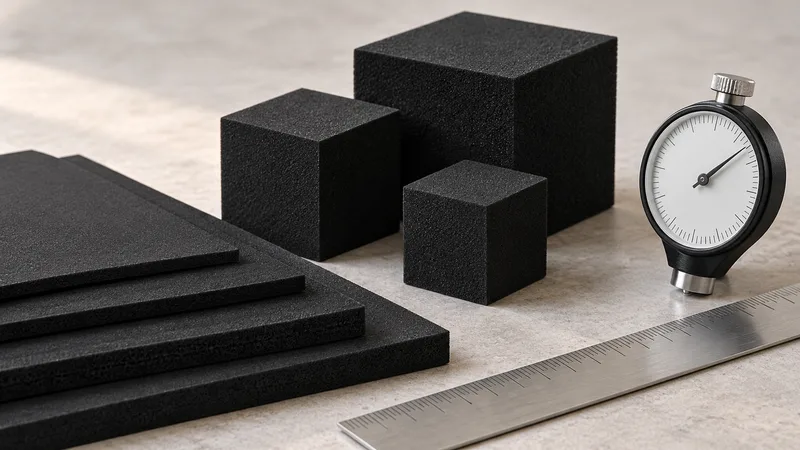
A Neoprene foam density and hardness guide helps a sealing team turn a general request into questions that can be reviewed. The customer record describes Neoprene for door, cabinet and dustproof-pad sealing. Open-cell or closed-cell selection, density and hardness remain project questions. For this topic, keep the application on sealing liners and sealing pads. The planning data lists 80–250 kg/m³ and 10–40 Shore C as [需确认], and exact density and hardness choices remain project decisions.
The Neoprene Foam product page is the starting point for a drawing-to-sample discussion. Share the product, enclosure envelope, format and expected volume before requesting a value. This guide shows how to connect a specification field with an observable enclosure-interface check without presenting an unverified range as a catalogue promise.
Describe the interface before selecting a value
Mark every surface that may contact the foam. Identify sensitive finishes, edges, protrusions and openings that require clearance. A broad product face may accept a liner, while a narrow edge may need a local pad or a gap. The same nominal hardness can feel different when the contact area and geometry change.
Explain the package and the handling sequence. Include the enclosure, case, closure and adjacent layers. Show where the installer grips the product and how the foam is installed or removed. A thickness that fits on a drawing can interfere with a closure or prevent a hand from reaching an edge. The specification should anticipate those practical checks.
Write the sealing objective in a testable way. Separation, surface cushioning, locating and controlled clearance are different tasks. If a buyer expects weather exposure or impact evidence, define the installed configuration and method separately. Hardness, color and thickness alone cannot establish a enclosure-level result.
- Identify product contact, support, keep-out and inspection surfaces.
- Show enclosure envelope, closure, available space and installation orientation.
- Describe the cushioning, separation or locating question the foam must answer.
- List the sample observations and evidence needed for acceptance.
Include format in the same brief. A sheet, roll-derived piece or custom gasket may expose different edge, seam and retention questions. If a set contains several pieces, define their order and registration. Format affects the meaning of thickness and handling, so it should not be left as an afterthought.
Commercial context helps organize the review without creating a promise. State expected volume, destination and revision frequency. Tooling, minimum order, lead time and production capacity require project confirmation. Keep them separate from the material choices so the specification remains technically clear.
Use hardness to discuss contact and cushioning
Hardness is useful only when connected to the interface and the purpose of the part. A locating pad may need enough support to keep a product oriented. A cushioning pad may be judged by how it manages contact under a defined condition. A liner may need a balance between conforming to a surface and allowing removal. Ask the manufacturer to relate the proposed value to the construction.
The planning range of 10–40 Shore C is marked [需确认]. Do not select a value simply because it appears inside that range. Request the proposed grade, measurement method, specimen condition and any tolerance that applies. If two samples have different hardness, record whether thickness, density, color or process also changed.
Contact geometry can dominate the result. A small rib may create a local pressure point while a wide pad spreads contact. A pocket wall may guide a product but make removal difficult. Review the sample with the actual product and installer sequence. The useful question is whether the proposed construction meets the defined task under the intended conditions.
| Choice | Define in the brief | Confirm in the sample |
|---|---|---|
| Hardness | Proposed value, method and cushioning purpose | Contact, support, removal and observed behavior |
| Color | Color reference, variation and identification role | Appearance, orientation and consistency |
| Thickness | Nominal, critical sections and available space | Clearance, closure, compression and fit |
| Geometry | Pockets, pads, edges and keep-out surfaces | Product interface and installer access |
| Release | Revision, tolerance and open requirements | Approval scope and restrictions |
Request relevant material evidence when it is needed for the decision. The ASTM International standards catalogue and ISO standards catalogue are reference starting points for terminology and methods. Select a suitable method with the project team. These links do not confirm a Green Foams material grade, test result or certification.
Keep hardness separate from absolute claims about durability, recovery or service life. Those outcomes depend on material, geometry, load and conditions. If the buyer needs such evidence, define the conditions and request project-specific support. A visual fit check should not be described as proof of an untested property.
Confirm open-cell or closed-cell construction
The customer record does not confirm a universal open-cell or closed-cell supply route for CR Foam. Treat cell structure as a project question alongside density and hardness. Explain whether the door, cabinet or dustproof-pad interface needs a particular contact, dust-control or recovery behavior, then request the proposed construction and supporting evidence.
Do not infer cell structure from appearance, color or a photograph. Ask for the grade reference, specimen description and applicable method. If two samples differ in cell structure, record that difference before comparing thickness, contact and installation. The same nominal density or Shore C value does not make two constructions interchangeable.
Color remains a visual control only. Specify a reference and acceptable variation when installers need orientation or part identification, but keep that requirement separate from density, hardness and cell structure. A color change may accompany a material revision, so record whether any dimensional or fit checks must be repeated.
- State whether open-cell or closed-cell construction is required, preferred or still open.
- Request the proposed grade, specimen and method before treating cell structure as approved.
- Keep color for identification or appearance, never as a performance proxy.
- Repeat dimensional and fit checks when cell structure or grade changes.
Use thickness to balance protection and enclosure space
Thickness begins with the available door, cabinet or equipment-enclosure space and the required gap or dust barrier. Measure the assembled envelope, including closures and adjacent layers. Identify nominal thickness and critical sections where a tolerance matters. A custom gasket may have several thicknesses; list each one against its interface.
More material does not automatically mean more protection. It can change closure force, access and product location. A thin layer may be adequate when the enclosure supplies support, while a thicker pad may be needed at a local contact. Ask which dimension controls the decision and how it will be inspected.
Review compression or contact only under an agreed condition. An enclosure drawing can show clearance, but it cannot establish behavior under every load or weather exposure event. If a test is required, define the specimen, configuration, method and acceptance threshold with the buyer. Keep the result attached to the reviewed revision.
| Question | Material evidence | Enclosure evidence |
|---|---|---|
| Value | Grade, unit, method and specimen | Observed result on the actual construction |
| Fit | Nominal thickness and proposed tolerance | Critical interfaces, closure and clearance |
| Handling | Format and surface condition | Loading, removal, replacement and orientation |
| Sealing objective | Relevant property information | Defined enclosure configuration, method and acceptance |
| Change | Effect of grade or color revision | Checks to repeat on the new enclosure revision |
When format or thickness changes, repeat the checks affected by that change. A new edge may alter access. A thicker liner may contact a closure. A thinner pad may change product movement. Document the reason for the revision so a later sample can be compared with the correct baseline.
Approve a specification through a controlled sample
Prepare the sample record with the product drawing, package, proposed format, hardness question, color reference and thickness dimensions. Identify the reviewer for fit, appearance, handling and any defined protection evaluation. Label what the sample represents and what remains open.
Observe loading, removal, orientation and retention. Inspect contact at sensitive surfaces and clearance at closures. Confirm color on the visible surfaces and measure critical thicknesses with the agreed method. If a sample is cut or assembled differently from the proposed production route, record that limitation.
- Define the product interface, enclosure envelope and sealing objective.
- Request proposed hardness, color, thickness, grade and relevant evidence.
- Review fit, handling, appearance and the agreed protection condition.
- Record approval scope, restrictions, revision and checks to repeat after changes.
Include the people who install or maintain the enclosure in the review. An installer may notice that a locating wall is difficult to reach, that a color cue is unclear or that a thick pad slows door or panel removal. These observations complement dimensional inspection. Record them alongside the drawing so the chosen hardness and thickness serve the real handling route.
Plan a small change review before routine supply begins. Ask what happens if the product finish, enclosure, color reference or available space changes. Identify which dimensions and appearance checks must be repeated and which records remain valid. This prevents an old sample from becoming an informal approval for a new construction.
Keep measurement tools and conditions consistent when comparing samples. State where thickness is measured, how a critical section is located and which surface is inspected for color. If the method changes, note that the values may not be directly comparable. The goal is a decision record that another reviewer can reproduce.
For a broader selection sequence, read How to choose Neoprene foam for sealing applications. For format decisions, use Neoprene sheets, strips and custom gaskets. If another sealing material is being considered, review Neoprene vs EPDM foam. Send the controlled brief through the Neoprene customization workflow so the next discussion can address feasibility and evidence.
A strong specification states what the material should be, where it sits, how it is handled and how acceptance will be decided. It also states which values remain [需确认]. That discipline keeps density and hardness useful to engineering and purchasing without turning a planning range into an unsupported guarantee.
Use one controlled record for the specification and the sample observations. Record the proposed grade, test method, specimen condition and drawing revision beside each hardness or thickness value. Add a simple visual reference for the approved color and identify which surfaces were inspected. If a value is still open, leave it marked [需确认] until the project team supplies evidence; do not let a provisional number migrate into a purchase description.
When the enclosure contains several Neoprene pieces, review their interaction as a set. A thicker wall on one piece may reduce clearance for another, and a color or hardness change may affect how installers identify the order of assembly. Label each component, inspect the complete enclosure and record which dimensions are shared. This makes later revisions easier to assess without assuming that a change to one piece is isolated.